
How Is Aluminium Cladding Installed? The Complete Process at a Glance
The render shows a perfectly flat facade. The site shows three days of subframe and no panels up. Aluminium cladding installation is the difference between the two. The process runs in five stages: surface preparation, waterproof membrane, подпрос, panel fixing bottom-up, then sealing. A crew fixes click-on panels at 6-10 m² an hour and one-piece panels at 2-3 m² an hour.

Aluminium cladding installation follows five stages: surface preparation, waterproof membrane, подпрос, panel fixing and edge sealing. Panels go up from the bottom to the top so each course locks onto the one below. Solid aluminium panels use a staggered corner bracket that leaves a uniform 1-2mm joint, while interlocking panels click together over a fixed track. The process is fast when the system matches the job: click-on panels run at 6-10 m² an hour, one-piece panels at 2-3 m² an hour. Leave a 10-15mm expansion gap outdoors and a ventilated cavity of at least 20mm behind the panels, and the facade stays flat and dry for decades.
| Этап | What happens | Key check |
|---|---|---|
| 1. Surface prep | Clean and level the wall, set out reference lines | Flat substrate before any panel |
| 2. Waterproofing | Fix the membrane, tape the laps | Membrane intact behind every panel |
| 3. Subframe | Build the frame, leave the cavity | At least 20mm air gap, no ordinary steel outside |
| 4. Panel fixing | Fix panels bottom-up, staggered brackets | 10-15mm outdoor expansion gap |
| 5. Запечатывание | Seal ends, fit caps, touch up cuts | No open joint at any panel end |
This guide replaces a thinner five-point version with the full sequence, the complete tool list and the seven mistakes that cause rework. If you only remember two numbers, keep the 20mm cavity and the 10-15mm outdoor gap. They prevent most failures before they start.
Solid Aluminium vs ACP: Know What You’re Actually Installing
Before you fix anything, know what you are fixing. Solid aluminium cladding is solid metal: flat panels in 3003 или 5052 alloy at 1.5-3.0mm, or extruded interlocking panels in 6063-T5 at 1.0-2.0mm. Aluminium composite panel (Атмосфера) is two thin skins bonded to a plastic core. The two are not interchangeable on site.

Solid aluminium cladding and aluminium composite panel (Атмосфера) are different products with different installs. Solid cladding is solid metal: flat panels in 3003 или 5052 alloy at 1.5-3.0mm thickness, or extruded interlocking panels in 6063-T5 at 1.0-2.0mm. Both fix mechanically to a subframe and allow a tight joint with a 1-2mm seam. ACP is two thin aluminium skins bonded to a plastic core, fixed with clips or adhesive and usually left with wider open joints. For a non-combustible facade that clears AS 1530.1, solid aluminium is the default choice, because ACP needs its core specified carefully to pass NCC 2025.
| Solid aluminium cladding | Атмосфера / ACM | |
|---|---|---|
| Материал | 3003/5052 or 6063-T5 solid metal | Two skins + plastic core |
| Толщина | 1.0-3.0мм | Composite build-up |
| Joint | Tight joint, 1-2мм | Open or caulked joint |
| Исправление | Mechanical corner bracket | Clip or adhesive |
| Огонь | Невозможно, КАК 1530.1 | Depends on the core |


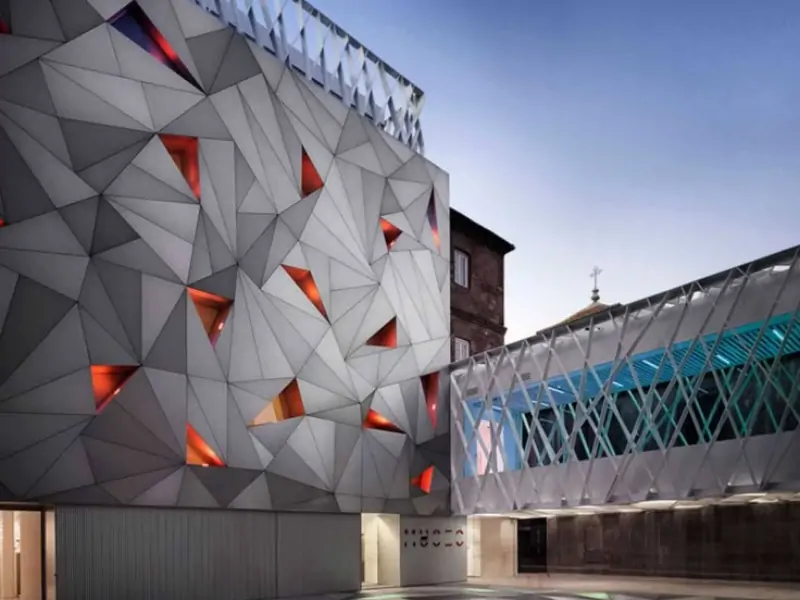
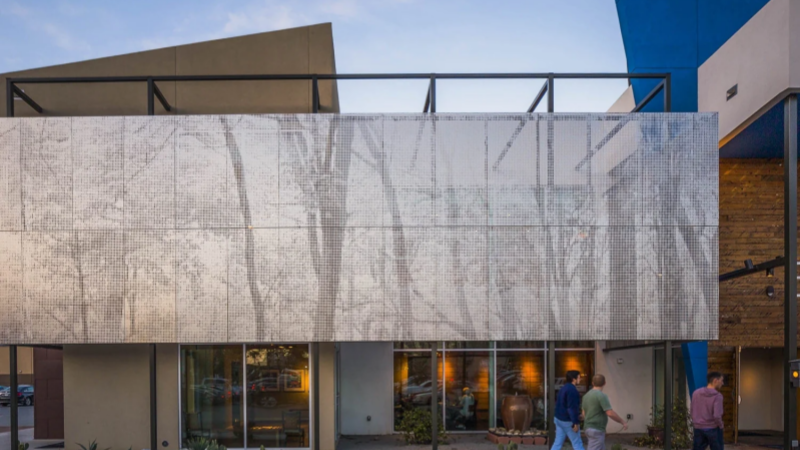

This article is about the solid side: the panels that go up with mechanical brackets and a tight joint. For the background on what aluminium cladding is and a full solid vs composite cladding comparison, those two guides cover the product science. Once you know you are fixing solid panels, the full aluminium cladding range is the place to pick the profile.
Tools and Materials Checklist (Complete List)
The tool list splits into five groups: measuring, резка, fixing, sealing and safety. The materials are just as specific: stainless self-tapping screws in 304 оценка, или 316 near the sea, plus steel corner brackets, rivets and neutral-cure silicone. Buy everything before the crew arrives and the install never stalls.
An aluminium cladding install needs five tool groups. Measuring: рулетка, laser level and chalk line. Резка: a circular saw with a non-ferrous blade, a jigsaw and metal shears. Исправление: stainless steel self-tapping screws, 304 grade as standard and 316 on coastal jobs, expansion bolts, steel corner brackets and rivets. Запечатывание: neutral-cure silicone sealant, end caps and a matching touch-up pen. Безопасность: cut-resistant gloves, eye protection and scaffold. For the subframe, use aluminium or hot-dip galvanised steel, never ordinary steel outdoors.
| Group | Items | Примечание |
|---|---|---|
| Measuring | Tape, laser level, chalk line | Set out the bottom course first |
| Резка | Круглая пила (non-ferrous blade), jigsaw, shears | Cut slowly, aluminium clogs fast blades |
| Исправление | 304 винты (316 прибрежный), expansion bolts, brackets, rivets | Match fastener to exposure |
| Запечатывание | Neutral-cure silicone, торцевые крышки, touch-up pen | Seal every panel end |
| Безопасность | Cut gloves, eye protection, scaffold | Cut edges are sharp |
The fastener rule is the one worth memorising. 304 stainless is fine inland. Within a few kilometres of salt water, step up to 316, because salt spray corrodes 304 and the failure shows up as rust streaks long before the panel itself ages.
Шаг 1: Surface Preparation and Waterproofing
The wall has to be flat before a single panel goes on, especially for tight-joint solid cladding where a 1-2mm seam exposes any wave in the substrate. Walk the site and check for cracks, stains or broken sealants, then measure every wall. This is also where you confirm the aluminium cladding panel details, including composition, размеры, finishes and performance, which is crucial for specifying and installing the right material.
Surface preparation decides whether a tight-joint cladding wall looks flat. Clean the substrate of dust and loose material, check it with a straight edge and set out the bottom course and reference lines before touching a panel. A tight joint of 1-2mm leaves no room to hide an uneven wall, so level the substrate first and shim the subframe wherever it runs out. Then fix the waterproof or breathable membrane over the substrate with lapped joints, taped at the laps, and keep the membrane intact behind every panel. Water that gets behind cladding must run out, not sit against the wall.
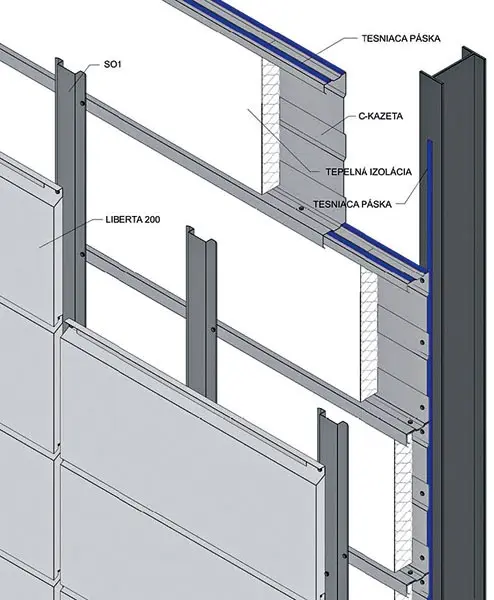
Run this checklist before ordering panels:
- Check that insulation boards are attached well to the wall.
- Ищите трещины или голые пятна в базовом слое.
- Inspect the finish coat for damage or holes.
- Make sure sealants around windows and doors are intact.
- Examine flashings for problems.
- Следите за водными пятнами или признаками утечек.
Measure every wall, including around windows, doors and corners, so you order the right panel quantity and avoid waste. A moisture meter catches hidden water before it gets trapped behind the cladding. Run these checks before the job and after any big storm.
Two habits save the whole job here. Keep the protective film on the panels through transport and framing, and peel it only when the wall is complete; film left on bakes into the finish, film peeled early leaves scratches. And mark the bottom course first, because every course above it references that line. The membrane and the cavity work together, which is the next step.
Шаг 2: Subframe, Ventilated Cavity and Thermal Movement
The subframe carries the panels and absorbs their movement. Build it from aluminium or hot-dip galvanised steel, never ordinary steel outdoors, and leave at least 20mm of ventilated cavity behind the panels. Aluminium expands at 23×10⁻⁶ per degree Celsius, so a 3m panel moves about 2.8mm across a 40°C swing.

The subframe has two jobs: hold the panels and let the wall breathe. Build it from aluminium or hot-dip galvanised steel; ordinary steel corrodes outdoors. Leave a ventilated cavity of at least 20mm between the back of the panel and the wall so condensation drains and dries. Then account for thermal movement: aluminium expands at about 23×10⁻⁶ per degree Celsius, so a 3m panel moves roughly 2.8mm across a 40°C temperature swing, and a 6m panel about 5.5mm. на открытом воздухе, leave a 10-15mm expansion gap so the panels can move without buckling.
Thermal movement scales with panel length:
| Длина панели | Movement across 40°C |
|---|---|
| 2м | about 1.8mm |
| 3м | about 2.8mm |
| 4м | about 3.7mm |
| 6м | about 5.5mm |
The gap is not optional decoration. A panel that cannot expand pushes against its neighbour, and the wall shows it as waves, the oil-canning effect. On long runs or tall walls, add a horizontal brace every 2 metres to keep the frame true. The frame also carries wind load, so engineers usually work to a safety factor of four or higher and plan fastener positions to avoid twisting the rails.
Шаг 3: Panel Fixing with the Staggered Corner Bracket Method
Solid aluminium panels go up with a staggered corner bracket in four steps: locate the first panel, fix its key corners, stagger the next panel into the gap, then fix in sequence. Work left to right and bottom to top. Add a stiffener to any panel over 600×800mm, spaced at 550-600mm, and never use an iron stiffener.

Solid aluminium cladding achieves its tight joint through a staggered corner bracket, fixed in four steps. Locate the first panel with its top-left bracket on the steel frame, left unfixed. Fix only the right and bottom brackets, leaving the left and top free for the next panel. Stagger the next panel by sliding its bracket into the freed gap and push it tight. Then fix in sequence, working left to right and bottom to top. The fold radius leaves a uniform 1-2mm seam. On panels over 600×800mm, add a stiffener at 550-600mm spacing, and never an iron stiffener, which rusts through within three years.
The four steps, one at a time:
Working bottom-up matters because the first row sets the level for the whole wall, and each course above rests on the one below. Вода бежит вниз, so a panel that overlaps the one beneath it sheds rain rather than trapping it.
Handle panels on their side, never flat, and stack them with the coated faces together. Store them dry at 15-25°C and below 60% humidity until the day they go up.
The stiffener is the hidden line on the back of a panel. Anything over 600×800mm needs one, spaced at 550-600mm, and it must be aluminium, because a cheap iron stiffener corrodes through in about three years and the panel sags with it. The whole method is built around the solid aluminium cladding panels система, where the bracket and the stiffener are supplied as matched parts rather than improvised on site.
Шаг 4: Резка, Sealing and Edge Finishing
Cut aluminium with a non-ferrous saw blade and feed it slowly, then seal every cut edge with a matching touch-up pen so moisture never meets bare metal. Fit end caps by interference with a rubber mallet and run neutral-cure silicone around every end and screw hole. Finish the perimeter with sealant or a trim.Aluminum cladding installation
Cutting and sealing decide how long a cladding wall stays weathertight. Cut aluminium with a circular saw fitted with a non-ferrous blade and feed slowly to avoid a ragged edge, then touch up every cut edge with a matching colour pen, because a bare cut edge is where water and corrosion start. Fit end caps by interference, tapping them on with a rubber mallet, and run neutral-cure silicone around every end and screw hole. Finish the perimeter either by caulking the joint or by covering it with a trim, leaving the 1-2mm radius corner as a clean shadow line.
Mark cut lines with a pencil or chalk, clamp the panel down, and wear goggles and gloves. A circular saw with a fine-tooth blade handles straight cuts; a jigsaw covers curves and notches. Cut slowly, because aluminium clogs a fast blade and a rushed cut leaves a jagged edge. Smooth the edge with a file before sealing.
Two finishing routes cover most walls. Caulking the perimeter joint with neutral-cure silicone is the quick way and works for plain runs. A trim or cover profile hides the joint and suits corners and openings. One note for timber-look panels: the woodgrain is transferred in a vacuum process, not painted on, so a field touch-up pen matches a cut edge but will never reproduce the grain itself. Plan your cuts to land on a hidden edge where a flat colour patch reads as a shadow.
Once the wall is sealed, walk it end to end and check loose fasteners, gaps in the sealant, bent panels and any signs of water or rust. Catch these early and the cladding holds its weathertight seal for its full service life.
7 Common Aluminium Cladding Installation Mistakes (And How to Avoid Them)
Most cladding failures are installation errors, not material faults. The seven that cost the most are: missing expansion gaps, iron stiffeners, ordinary steel subframes, 304 screws near the sea, unsealed panel ends, protective film left on, and an uneven subframe. Each has a clear cause and a cheap fix.

el. Ordinary steel subframes corrode outdoors. 304 stainless screws pit within a few kilometres of salt water. Unsealed panel ends wick water in. Protective film left on bakes into the finish and shows as colour mismatch. An uneven subframe stops a tight joint from locking, because a 1-2mm seam has no tolerance to hide the wave. Fix each one before the panels go up and the wall stays flat for its service life.
| # | Mistake | Why it happens | Fix |
|---|---|---|---|
| 1 | No expansion gap | Panels expand and push each other | Leave 10-15mm outdoors |
| 2 | Iron stiffener | Rusts through in about 3 годы | Aluminium stiffener only |
| 3 | Ordinary steel subframe | Corrodes outdoors | Aluminium or hot-dip galvanised |
| 4 | 304 screws near the sea | Salt spray pits 304 | 316 stainless on coastal jobs |
| 5 | Unsealed panel ends | Water wicks in and rusts the fixings | Silicone every end and screw hole |
| 6 | Protective film left on | Sun bakes it into the finish | Peel after install, not before |
| 7 | Uneven subframe | Tight joint cannot lock on a wave | Level and shim before panels |
Oil-canning deserves one more sentence. It is the wavy, rippled look across a flat panel, and it comes from the panel being held against its own expansion, or from a stiffener that is too weak. Give the panel its 10-15mm of movement and a proper aluminium stiffener, and the wave does not appear.
How Fast Can You Install It? Labour Time and Cost Reality
Installation speed is set by the system, not by how hard the crew works. Click-on panels run at 6-10 m² an hour once the base track is fixed; one-piece panels run at 2-3 m² an hour. At Australian rates of $55-80 час, a click-on system saves 60-70% of the labour.
The install speed of aluminium cladding is decided by the system. Click-on panels run at 6-10 m² per hour because the face clicks onto an already-fixed base track, while one-piece panels run at 2-3 m² per hour with individual screws and end caps. At Australian skilled rates of $55-80 час, that gap cuts 60-70% of the labour. For a 1,000 м² фасад, a click-on system at 8 m² an hour needs around 125 crew hours; a one-piece system at 2.5 m² an hour needs about 400. The system choice, not the panel price, drives the installed cost.
Run the numbers for a 1,000 m² wall and the gap is blunt:
- Click-on at 8 m² per hour needs about 125 crew hours.
- One-piece at 2.5 m² per hour needs about 400 crew hours.
- В $80 час, that is roughly $10,000 against $32,000 in labour before a single panel is priced.
The material price looks like the decision, but on a commercial facade labour is the line that moves. For the full cost picture beyond installation, how much aluminium cladding costs breaks down the other drivers.
DIY or Hire a Pro?
Doing it yourself saves labour cost and you control the pace, but the risks are real. Tight-joint solid cladding is unforgiving: a misaligned first row or a skipped expansion gap shows up across the whole wall. If you have never worked with metal panels, start on a small wall or shed before tackling a full facade.
For most small jobs a competent DIY install of interlocking or click-on cladding is realistic, because the panels clip onto a fixed track and hide minor irregularities. For solid panels with a staggered corner bracket and a 1-2mm tight joint, the tolerance is too fine for a first-time installer to hold flat across a large wall. The economics change with height and scale: on a tall wall with many openings, a professional crew is faster, safer and typically required to keep the product warranty valid.
| DIY | Нанять профессионал |
|---|---|
| Более низкая стоимость | Более высокая стоимость |
| Требуется больше времени | Более быстрое завершение |
| Узнайте новые навыки | Профессиональная отделка |
| Риск ошибок | Меньше ошибок |
If your building is tall or has many windows, a pro can handle it safely and knows the local codes. Some warranties only apply when a licensed installer does the work, so check the small print before you commit. Ask for references and read reviews before hiring anyone.
Часто задаваемые вопросы
How long does aluminium cladding last?
Aluminium cladding lasts 30 к 50 годы. Clean it and check the sealant every year, and it will protect the building for decades.
Can I paint aluminium cladding panels?
Да. Use a paint made for metal surfaces, clean the panels first, and follow the paint maker’s instructions.
Что мне делать, если панель будет повреждена?
Small dents and scratches can be repaired with a patch kit and a matching touch-up pen. For large damage, remove the panel and fit a new one, then check for leaks.
Do aluminium cladding panels help with insulation?
Нет. Aluminium alone does not insulate; you add insulation behind the panels to keep the building warm in winter and cool in summer.
Xtra Metal Group supplies the solid aluminium cladding system end to end, with brackets and stiffeners matched to the panels rather than improvised on site, при поддержке 30+ years of project work. Эффективность установки является одним из четырех измерений в нашей как выбрать поставщика алюминиевой облицовки рамки, наряду с соблюдением, supply certainty and pricing. Send the wall area and panel type through the contact form and an engineer will return two or three workable fixing schemes with the labour estimate included.
Рекомендуемые продукты
Алюминиевая оболочка установка: The Complete Guide (Шаги, Tools and Common Mistakes)
Похожие статьи
- Алюминиевая облицовка по сравнению с композитной облицовками: Полное руководство по сравнению
- Сколько стоит облицовка алюминия?
- Что такое облицовка алюминия? Everything You Need To Know
- 10 Типы алюминиевой оболочки: Выберите лучшее для своего проекта
- Все, что вам нужно знать о металлических панелях в строительстве